Greetings. I am Stebloke, and I am a bit strange. This website contains my blog, where you can read about the things I create, the games I play, and any other things I get involved in.
I make this blog mostly because I like to look back on the things I do and feel nostalgic, but also because it keeps me motivated to keep pushing on with my backlog of nerdy little projects and tasks.
The "Filters & Pages" button in the top right will give you more control over what blog entries will be displayed, or the following quick links can be used:
During my little 3D printing marathon a few weeks back, I decided it was time I made the effort to flesh out some of my Epic armies. And up first were the Orks.
I'd finally used up most of the old resin during the printing I'd done earlier in the year, as well as some more recent Gaslands and Transformer things, so I needed some new stuff to continue to print.
I went with some black ABS-like resin, as not only was it pretty cheap, it was also water-washable, which at the time I thought would be better. Typically for me, I've continued to prefer washing in IPA anyway.
My first task was to try some tweaked settings, for a test print that would use my remaining old grey resin mixed in with some of the new black resin.
I'm pretty sure this was the first time I've printed that test piece and had everything work perfectly.
An actual successful test print
So 2026's second printing marathon kicked off, even though I'd not sorted, prepped, assembled or painted anything from the one back in May yet. Come to think of it, I've still got things to sort out that I printed last year, too.
These marathons happen because I only have set times when I can print, so I have to try and get as much done as possible over the available days. Of course, the intention is to then deal with all these prints during the time in between the marathons.
This has proven to be a bad way of doing things for a variety of reasons. During a marathon, I'm only really focused on setting up Lychee scenes, the printing of the models, and cleaning them in IPA. Due to lack of available time, these printed models then get left for weeks if not months before I can get around to dealing with the supports, a final clean if necessary, and then curing. This all sucks, because to keep them out of the sunlight, the prints from earlier in the year remained in the loft in the dark over the summer, and many of the pieces have warped in the heat.
From this point on, I will just have to print a single thing, get it cleaned, prepped, painted and varnished all in one go, before moving on to the next. I've actually bought some UV resilient varnish, that I was planning on putting onto the models after I'd printed and cured them, to protect them until I got to the painting. I've held off on this, as I think a lot of the detail might get filled in before the paint layer, which would suck.
This varnish will just have to go down before I do the matt varnish last thing. I think multiple varnish coats will also help the strength of some of these models, especially the ones printed in the old grey resin.
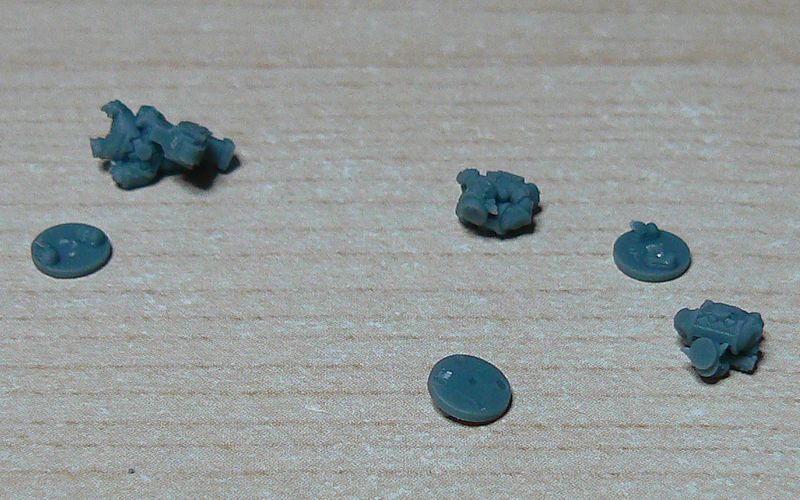
Gobsmasha fails after Gobsmasha fails
Nobz gettin' ready for a fight
One of the first things I printed this time were some new Gobsmashas. These are probably my favourite Ork vehicles from the old Epic 2nd Edition, and though I used to own some back in the day, I sold them for some reason and have always regretted it.
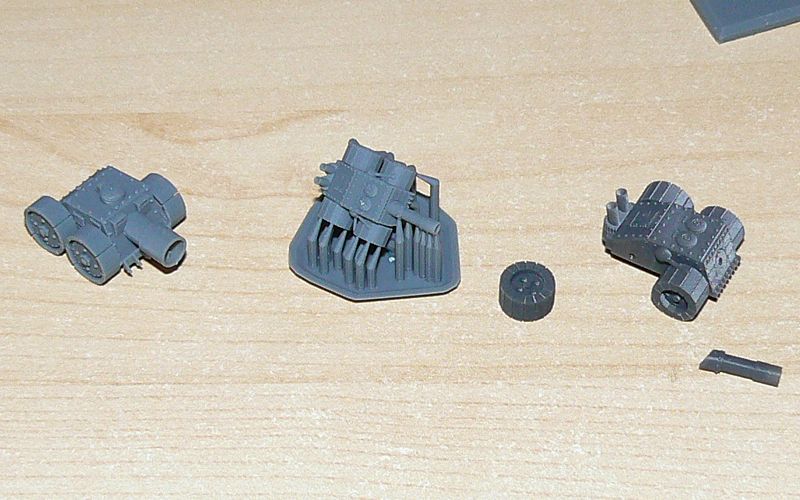
I'd printed some a few months back, but the wheels were attached by very tiny connections, and lots of them snapped off during the clean up. So I got hold of some alternate models, and sent a load of them to print. Somehow, I'd got the scale all wrong and they came out very small, so had to be reprinted.
Then when I started to remove the supports, I found that not only were some of the wheels not actually attached to the body, but neither was the turret. Whoever put this model on the internet must be giggling at how they booby-trapped it.
So now I can either just continue with these prints and glue them all back together, or finally get my ass into Blender and fix them all together properly and print them all again.
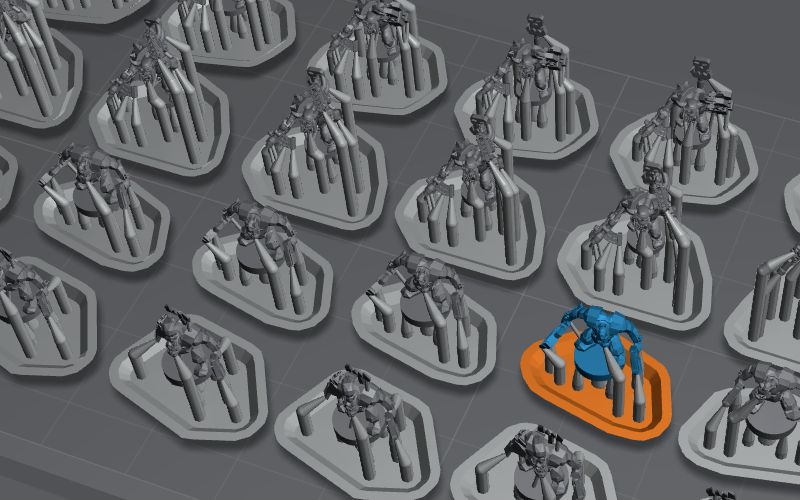
As the Blood Axe clan I'd put together from spare models back in 2018 was just not doing it for me, I then got to printing a ton of 6mm Orks, so that I could try and make a new one. In addition, I really needed to sort out the Kommandos and Stormboyz.
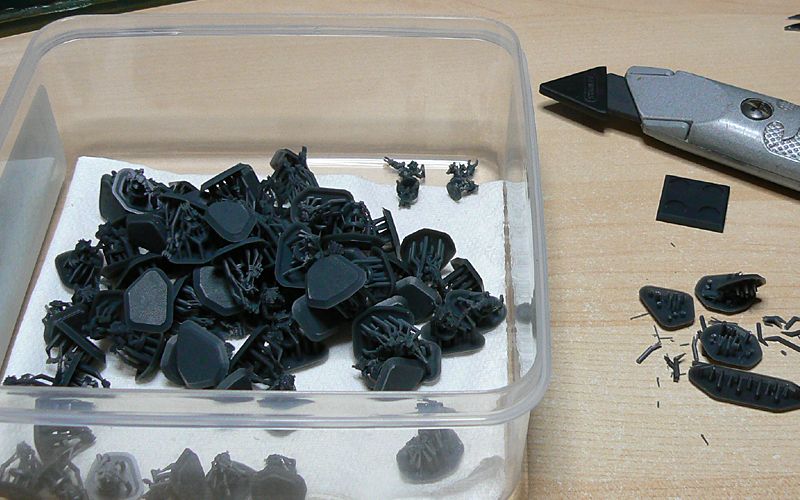
The removal of the supports for so many tiny miniatures was a chore, and as I alluded to earlier, some of the troops I'd printed in the old grey resin snapped during this process. This has got me nervous about using the rest of these prints in the final clan, but I really did not want to print everything all over again, so I decided to go ahead and use them.
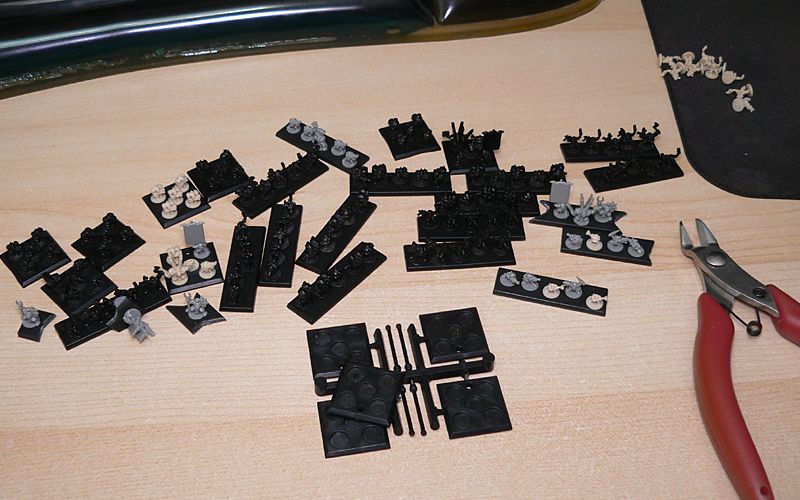
Support removal marathon
These new Ork lads have got weak shins
Before I could re-assemble the clan, I first had to remove a bunch of old models from the bases they were already on.
It really did not feel good cutting up all of those original 90s bases, especially as I'm still unsure about my 3D printed ones. But I really needed those models off of them, especially the Stormboyz.
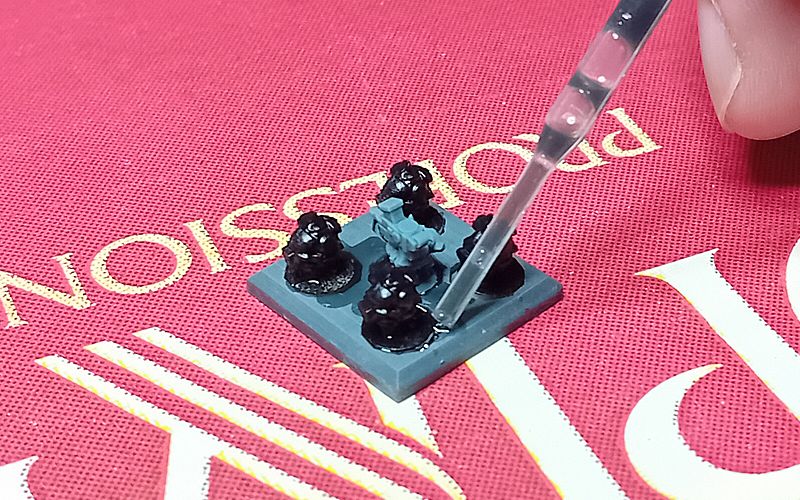
Gluing the models down onto the new 3D printed bases was easy enough, but the indents were too wide, resulting in many little gaps. To deal with this problem, I used a tiny pipette to deliver resin right to the necessary area, before curing it all. As I've had to use superglue rather than plastic glue, I'm also hoping this resin will help adhere the models to the bases.
Taking the snips to some old models
Using UV resin to fill some gaps
This technique seems to have worked quite well, but I guess I will only find out if that's true after months and years of use.
I did however hit one stumbling block, meaning the Blood Axes are not quite as finished as I hoped they would be.
For some stupid reason, I must have miscounted how many Kommando and Stormboy models I needed, and both of these units are shy by a single troop. Why I didn't print several spares like I did for the Boyz and Nobz I do not know.
This all means that those two units will have to wait a little longer, until I can get the 3D printer back up and running, in order to print off the final models.
Sucks.
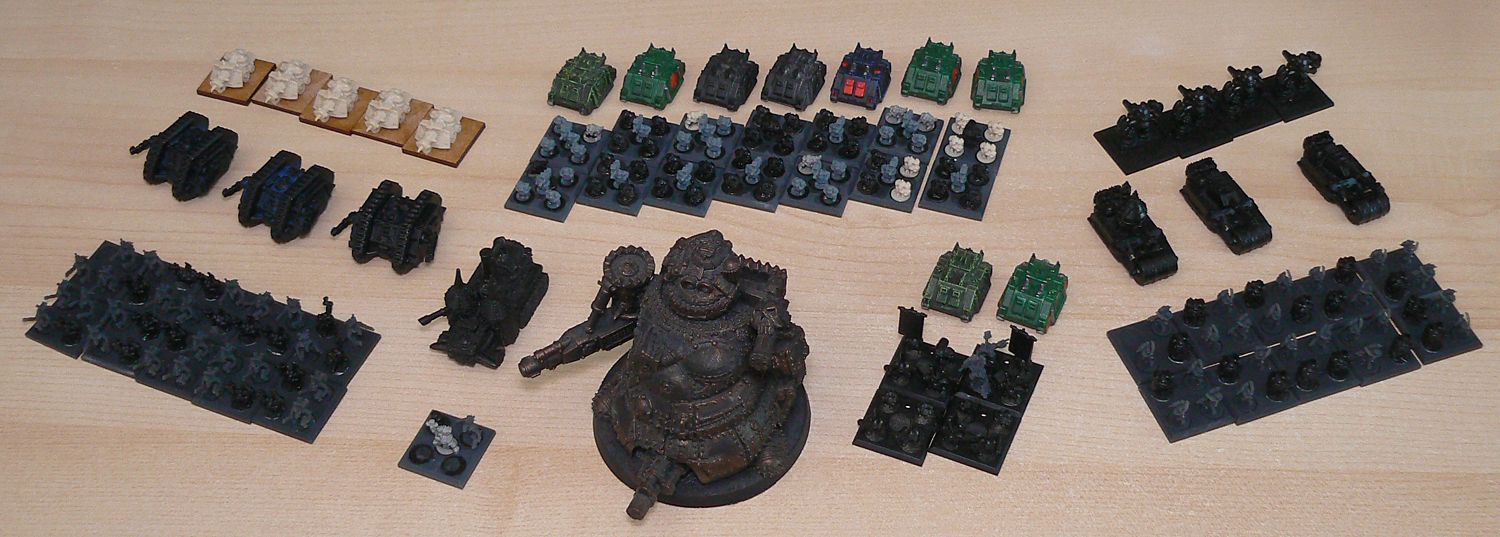
Anyway, despite all that, I'm happy with my progress on this clan, and now they look like this:
The newly renovated Blood Axe clan
It's a hell of a lot better than what they were looking like back in 2018.
11th October 2026: The Finest Dice Chucker In The West. Or Not.
My awesome wargaming skills have again been on display over the last few months, as I've been continuing to scrap it out using our own 40K-S ruleset.
Up first, Gareth got his first taste of these rules after playing the Epic-S rules a few times.
He brought his new Space Wolf force to the table to face my Marines with their Battle Sister allies in a 3000pt game.
The first turn started with G having some terrible rolls, especially the Aggressors as they shot a hail of bullets at the Scouts and only killed two.
But on turn 2, Bjorn started his rampage, which consisted of him smashing up a Land Raider, a Rhino and most of a full Tactical Squad. I got him down to 3 wounds but couldn't finish him off.
I had also deployed my Devastators in a terrible position and they had little to do all game.
Probably the funniest part of the battle was when the Iron Priest met the Techmarine in combat, and they killed each other using their Servo Arms.
The Battle Sisters provided little but a distraction, as they were smashed to pieces by the deep striking Wolf Guard Terminators.
This ended after 4 turns with a comfortable Space Wolf win, 2413 to 1706.
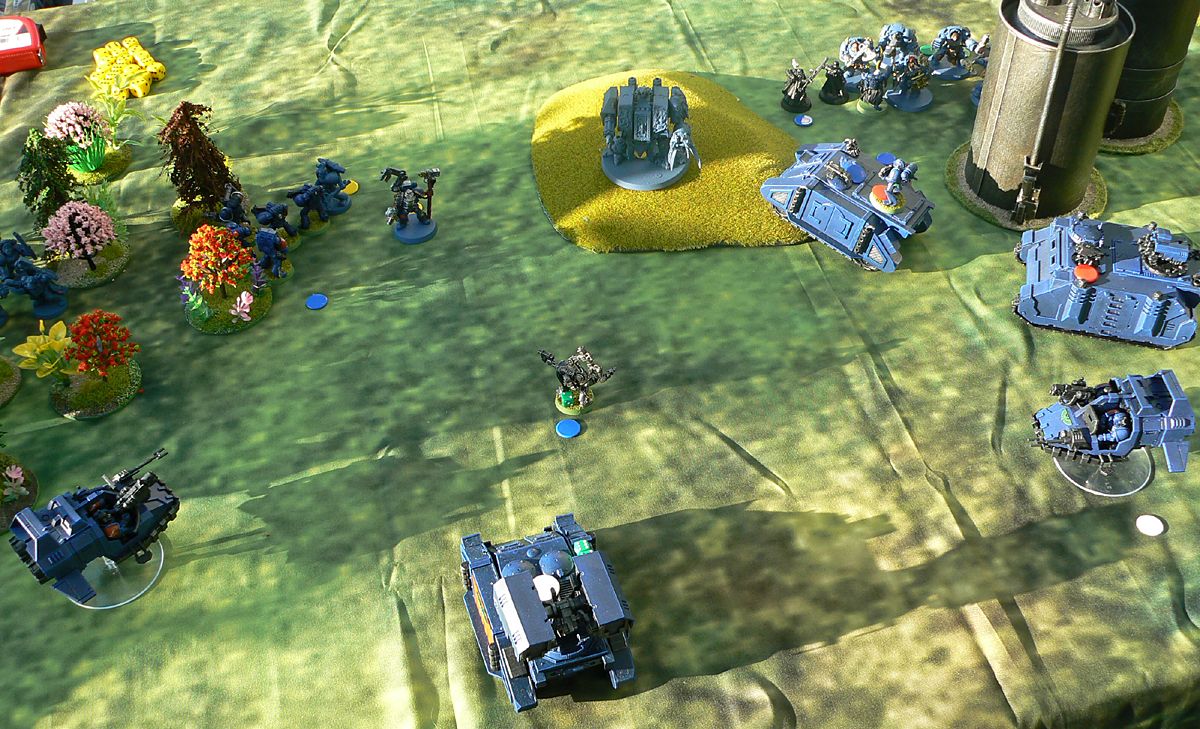
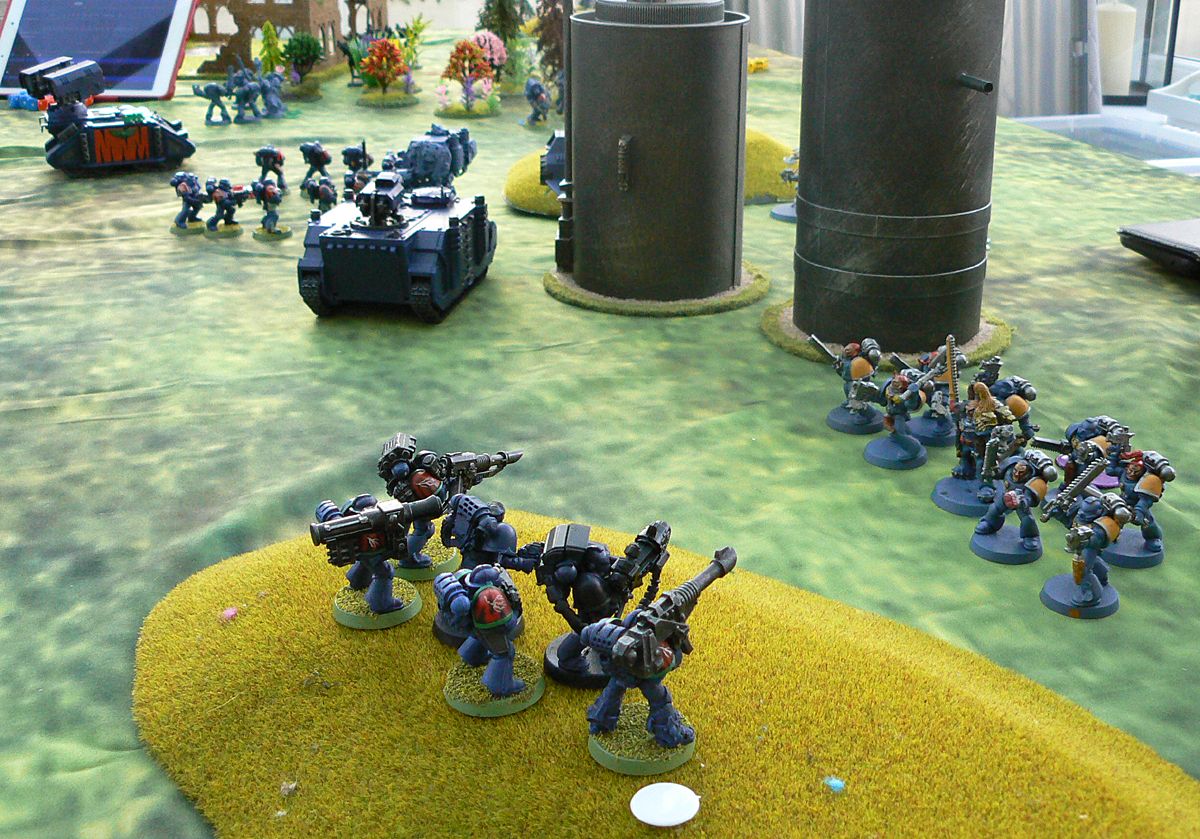
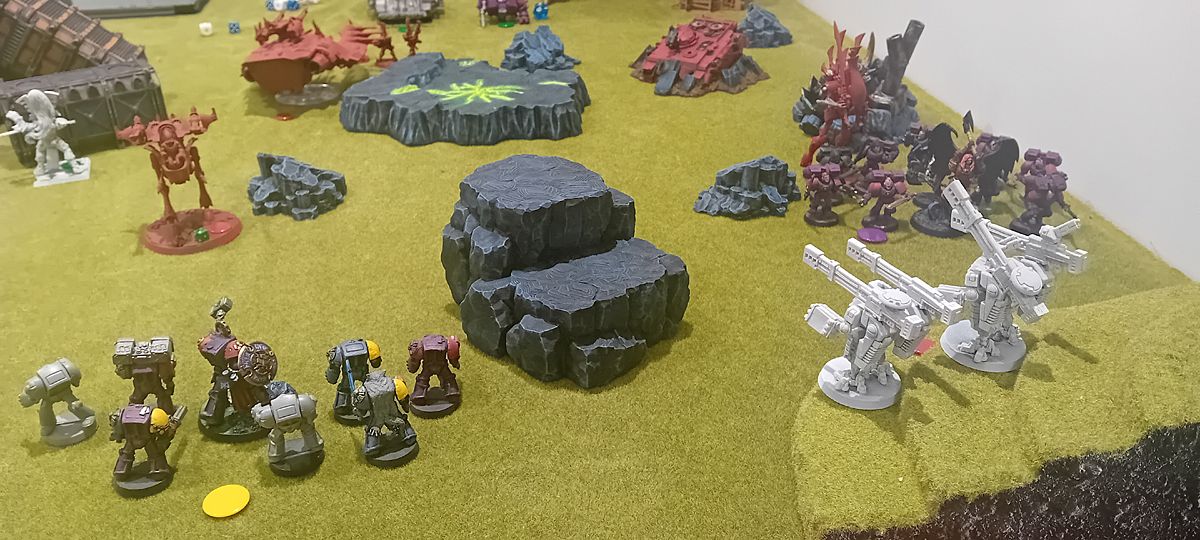
The Aggressors stomp forward
The Storm Tigers rally to try and handle Bjorn
The Space Wolves press their advantage
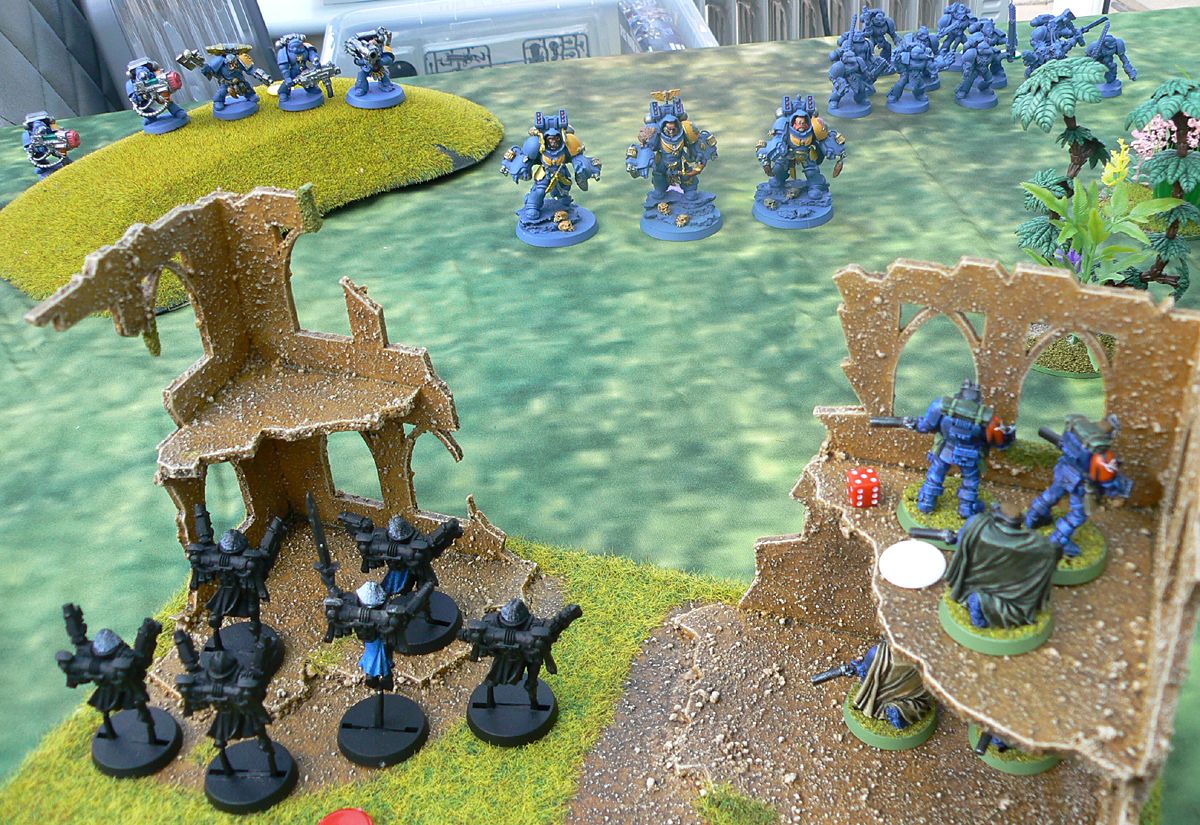
A few weeks later, I met these Space Wolves on the battlefield again, though this time taking pretty much all of my Eldar in a 2400pt game.
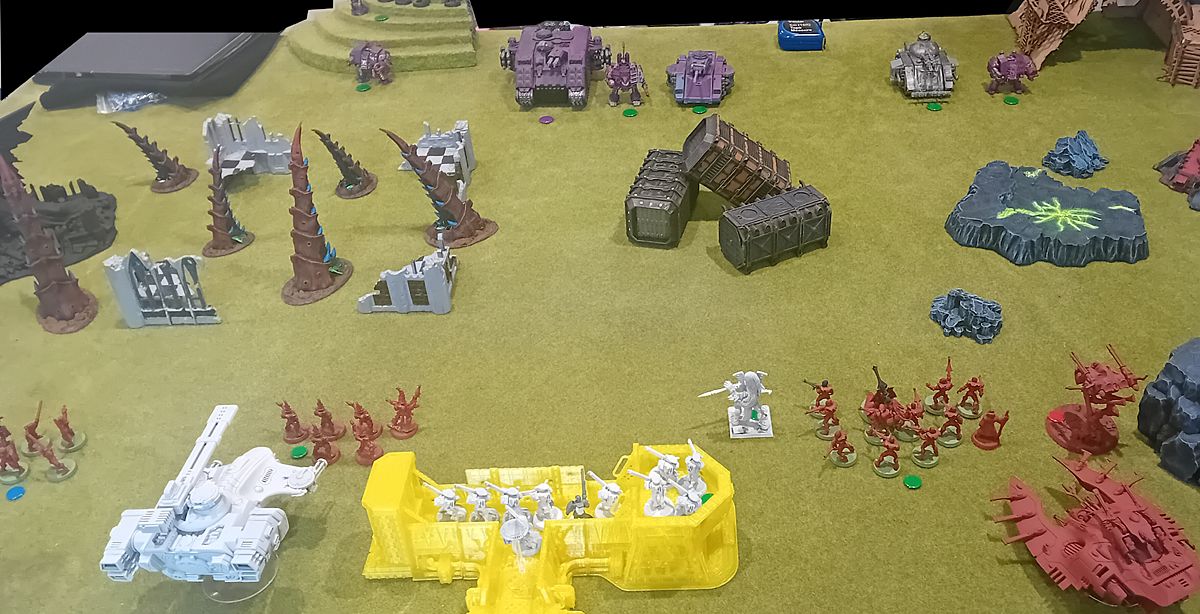
As I have little long range with my Eldar, one of my Guardian Squads and the Dire Avengers were wasted taking up position on the fortification. I guess I thought more of G's units would move into range over the course of the game, but that didn't really happen.
Once again, I had trouble getting rid of the Wolf Guard Terminators. In order to do any real damage, the Fire Dragons had to get in close. The first group was already weakened, but the 4 survivors took out three Terminators. As the other, unharmed squad of 6 closed in, I was hoping they would do just as well, if not better, but yet they could only kill off two of the tough Marines. As you may then expect, the Space Wolf revenge was swift and bloody.
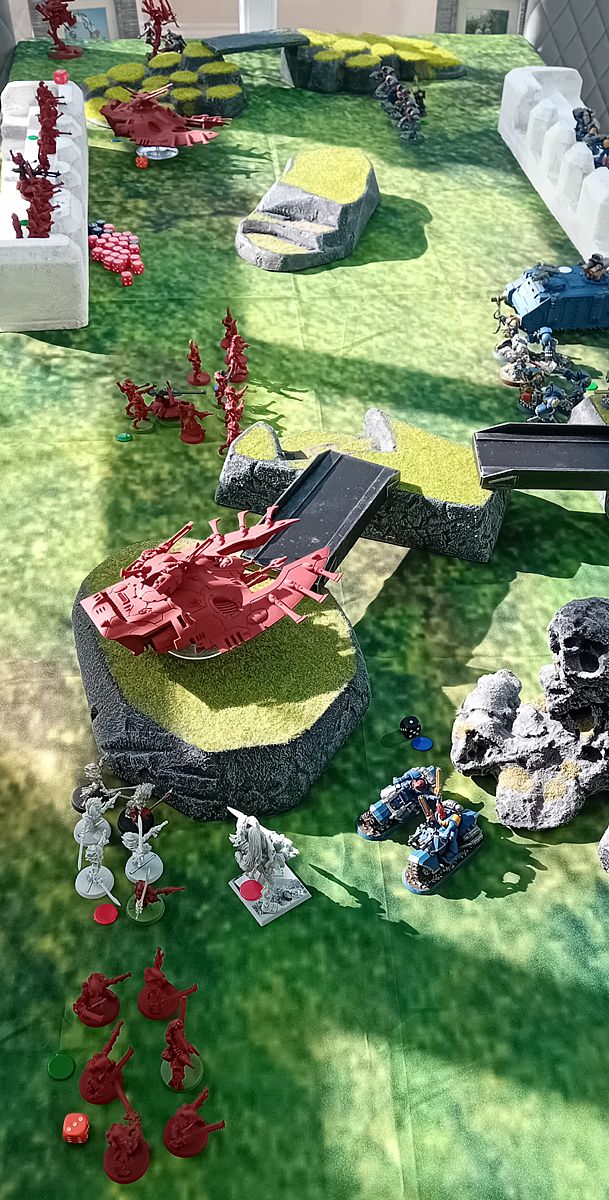
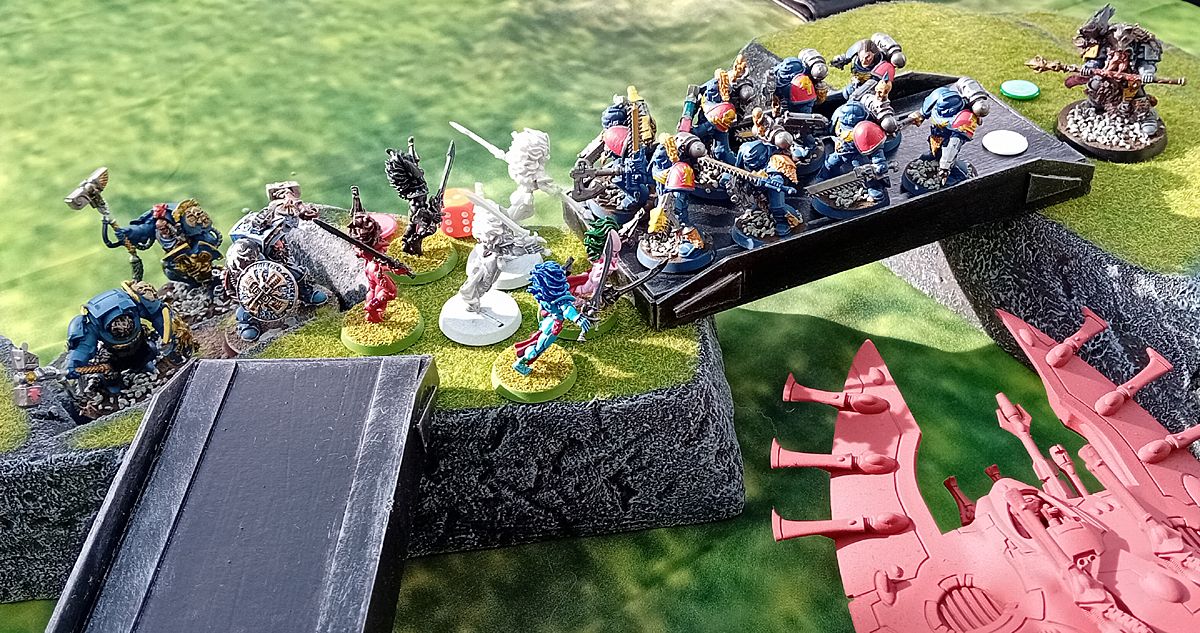
The bridges in the middle of the board became a blood bath, when they Banshees who were fighting the Grey Hunters were also attacked by the Terminators. Nearby, the Rune Priest smited the damaged Wave Serpent, which exploded and killed four Grey Hunters.
At the end of the third turn, Gareth had just snook over the victory point target with 1637, while I had 1292. Another poor showing from my Eldar, but a much better effort than when they last stretched their legs against Scoob's Tyranids and got absolutely smashed off the table.
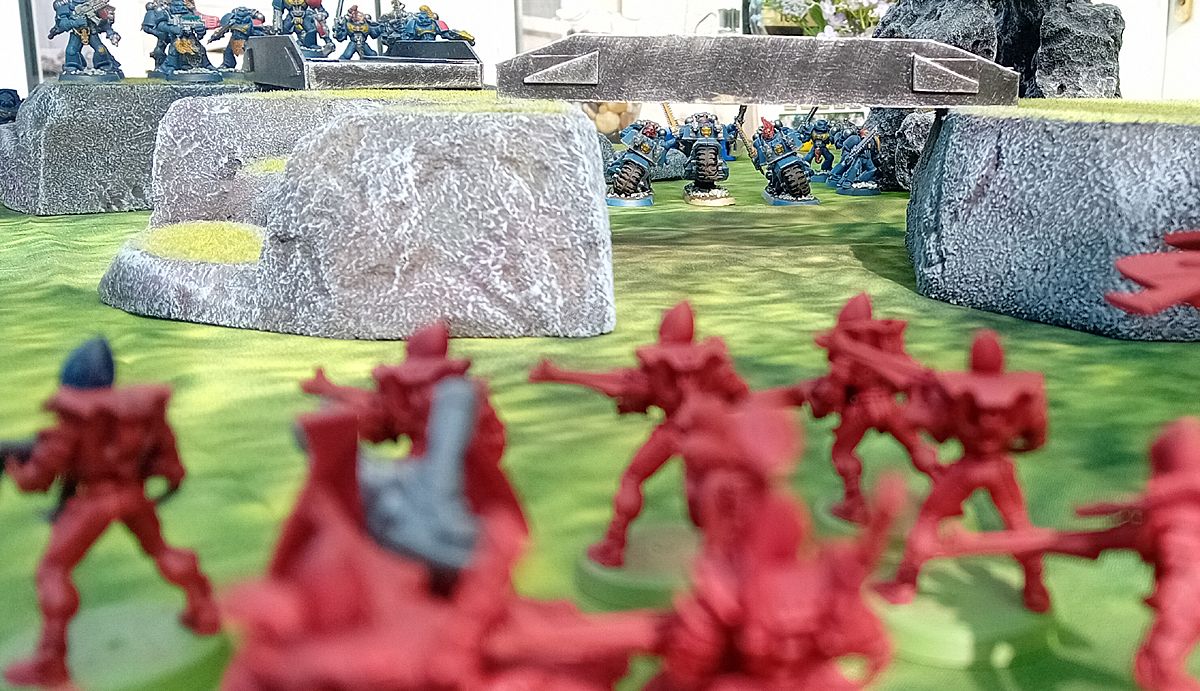
The Blood Claw Bikes line up a strafing run on the Guardians
The armies close in
Battle rages across the bridge of doom
Most recently, I again clashed with Scoob, who had also prepared a mostly Space Wolf force.
This time, I finally did something I'd been planning to do since all they way back in 5th Edition 40K, and put together a combined force of Tau and Eldar. I just wanted to see if the Tau's long range weapons could mitigate the huge weaknesses in my Eldar army.
Well, other than a couple of surprising events, this one went about as well as you would expect, and I struggled immensely to damage all of his vehicles and tougher infantry.
The thing that helped me most was on turn 2, after Scoob had dropped three scary looking units using the deep strike rules. This time, in contrast to the usual, I managed to get the initiative, so I could scupper his plans. My Wraithlord charged the Skyclaws to stop them getting their charge off, and the Wave Serpent carrying the Fire Dragons was able to escape Arjac and his accompanying Terminators.
Most surprising was that my five Scorpions and Karandras charged in against the other Terminators and managed to clean them off the table as Scoob rolled a plethora of ones on his saving throws.
Despite these minor setbacks, Scoob regained control, as the Wraithlord got hacked to pieces, and Arjac and his group got sweet payback on the Striking Scorpions.
One by one my units got taken out, with the exception of the Broadside battlesuits, who tanked a ton of damage. The last Fire Warrior also put up a fight, and must have made his save at least ten times against a hail of Storm Bolter bullets, before he finally fell.
As we added up the points each turn, it was clear I never really had much hope in this one, but we played it out until the point target was hit, with Scoob grabbing the easy win with 2349 to my 1454. I'm thinking I need to stop using these Eldar, at least until I've helped them with some reinforcements.
Or I could just be a better player I suppose.
The armies set up ready for a scrap
I attempt to counter Scoob's deep strikes
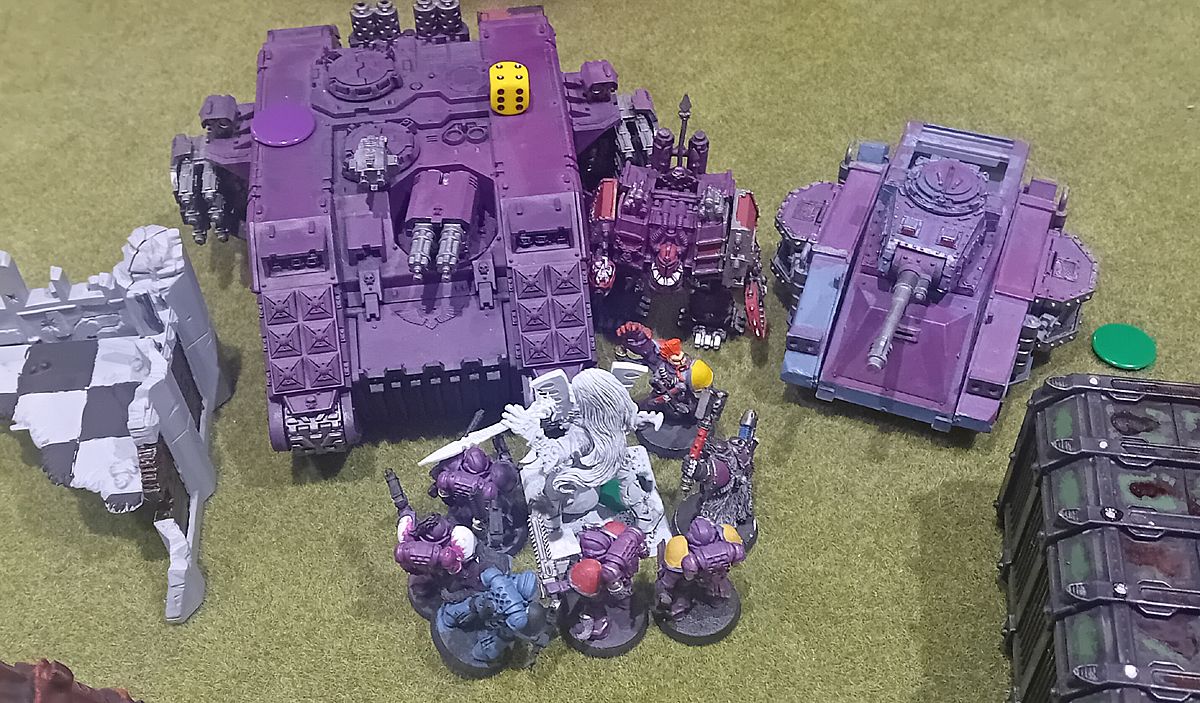
The Avatar wrecks the Land Raider before being swamped and defeated
6th September 2026: Cyber Renovations Β
As it's been pretty much a year now since I started my feeble attempts at renewing my old Transformers, I'd say it's about time for a little update.
Just after my first foray into this topic last year, I got a hold of some new boxes to stash everything in. But even the three new ones weren't quite enough, and I've still had to use a cardboard box for the few that remain homeless.
Then, during my 3D printing marathon a few months back, I'd found myself up against a few minor stumbling blocks that needed dealing with.
I certainly needed a proper way of curing things, so I ordered a small UV light with a solar powered turntable to handle this task. I then used some offcuts of wooden decking to make a frame to mount it on, as well as cutting some angled wood to stick some mirror-esque material to. These little assistants can now be positioned to rebound the light back at the models from the other direction.
Since the images below, I've also fixed some mirror material to the inside of the little frame, so now light will be bouncing around all over the place in there.
So, after all of the models I'd printed had had their turn under the UV light, I noticed many of them still had sticky patches. This meant I must not have washed them properly back in June. With a sigh, I plopped them all in some new IPA and gave them another good swill.
Thankfully, this time it looks like they've all come up good. And another lesson has been learned.
Boxing clever
Build me a curer worthy of printing
Let the curing commence
Cleaning that skank
Airing it out to dry
Seacons
Back when I was making that terrible webcomic, I struggled to get a hold of all the toys that I wanted to show up in it. This led to me doing some dodgy things like buying cheap knockoffs.
The worst of the ones I bought were definitely the Seacons. I'd managed to grab a few original G1s, but I was impatient and really wanted a Piranacon. I definitely made a mistake buying these, which were made from some of the poorest, softest plastic I've ever seen. Tentakil's tentacles snapped off immediately. Overbite's fin won't stay in, and his claws are loose. And when trying to use them for the comic, Nautilator's connecting joint snapped off inside my G1 Snaptrap's shoulder socket.
For whatever reason, I decided to pin and glue it back on.
Though I should highly doubt that those shitty Seacons will ever see the light of day again. That is because I eventually found a full Piranacon on eBay back in 2014. And while it's not an original G1, and is instead a reissue with inferior colours and a slightly damaged box, it still looks damn cool, and has pride of place on my small display shelf.
Only cost me £30 back then as well. That was cheaper than some of the G1 combiners I'd bought over 10 years earlier, like Defensor and Bruticus.
Some original G1 Seacons
Crappy knockoff Seacons are crappy
Pinning a pin
Commemorate this
Seekers
Behind the combiners, it is the Decepticon jets that are my next favourite figures. My much newer Starscream and Skywarp have little things I want to do to them, but it's my original 80s Thundercracker and Dirge that need a bucket load of attention.
They were still bodged together to form a usable figure for the comic, so the first order of the day was to re-assemble them back into their original forms.
What I'd got was a Thundercracker with missing wings, a damaged nose cone, a snapped clip at the top of his arm, a snapped left tail fin, a missing rear wing/stabiliser, and missing inserts into his weapons.
And then there was Dirge, who had missing a screw, missing his weapons, and had opposite orientation of the stickers on his wings, as one had been a replacement from eBay.
And then between them, there was only one set of fists and one landing gear. Either they were gonna have to learn to share, or something needed to be done.
I first printed some new wings, which looked really good back in June, but have since slightly warped in the heat of the loft in these intervening months. The first replacement tail fin I printed had a pin that was too small, and so kept flopping back. This has led to me finding and printing a different type, and these work a lot better.
The new rear wings I've printed however, will either need some filing doing, or a reprint after some tinkering in Blender, as the pins are too big for the holes they need to go in.
I've tried printing a new landing gear, but its pin is too small for the hole and easily falls out. However, it is technically usable, so I'm not sure whether to reprint this or not.
I also tried printing a new fist as a test, but this time it's too big and just falls straight off the arm it's supposed to be on. I can easily shrink this and try again, or get it into Blender and add some little bumps on the inside like the original fists have.
Two old Seekers in need of assistance
Take your starting positions
That 1st new tail fin is a bit floppy
Current status: robot mode
Current status: jet mode
Magnus Prime? Optimus Ultra?
My poor old original G1 Optimus is basically a deceased bit of kit. There are just so many broken and missing pieces on it that it could not ordinarily be restored without some serious effort.
My old Ultra Magnus is not quite that bad, and was in fact usable for the webcomic provided I borrowed some parts from the Optimus figure.
But now I want to put them back to their original selves and fix them up as best I can. In order to help me do this, I grabbed a fairly crappy Optimus knockoff. The idea here is that I can hopefully borrow bits from it to renew the original if needed. Shame the delivery man mushed up the box, as I can't really use that as a display box any more, as it's otherwise quite decent.
There'll have to be a hell of a lot of work to get these two back up to scratch, and I think I'll have to follow a plan much like this one:
Completely disassemble the figures.
Clean all of the plastic parts and remove old crappy stickers.
Look at the joints. Grease or tighten depending on how they've degraded. New screws or fixings may be needed.
Fully strip the battered die-cast parts and repaint.
Repaint the chrome sections.
Replace missing/damaged parts with parts from the bootleg.
3D print anything else that is missing, if possible.
This is going to be a massive task, among many massive tasks that I have ongoing. So it may be unlikely to happen any time soon. It would just be real nice to get old Optimus looking spiffing again.
At least the new gun I found for Magnus printed well. In fact, I like it so much I printed it again so he can dual wield.
Trucking hell. What a mess.
Can a cheap knockoff save the day?
Not having much luck with these boxes
Magnus shows us his guns
Others
I've also tried to print a few other random things that don't need any prior tinkering in a 3D modelling program.
As I've got a lot of Headmasters who have literally lost their heads, I've tried printing one out for Skullcruncher. I think it's going to work when it's all put together, but it does not look like the figure will stay together and still be transformable.
I think I will have to print another, and glue one together in head form, and the other in robot form.
I have also tried to print a new tail/sword for this guy, but like the jet wings, it has warped in the heat before I've glued it together, and now looks unusable. Maybe I can warm it up, correct the damage, and glue it in place all in one motion. Or maybe I'll just print it again.
And after an enormous print failure that was featured on this blog a few months back, Blitzwing now has a new turret for his tank form. If I could find some replacement hands for this guy that would be swell, as I still have his old sword, but he currently has no way of brandishing it.
Trying out a new head
I'm sure Blitzwing will appreciate being able to shoot things again